 how-to
How to Break In New Brake Pads Properly
Table of Contents
- Why New Brake Pads Need a Break-In Period
- What You'll Need Before You Start
- How to Bed In New Brake Pads and Rotors: The Step-by-Step Process
- How Long to Bed In Brake Pads
- What Happens If You Don't Bed In New Brake Pads
- Brake Pad Glazing Symptoms and How to Prevent Them
- Common Mistakes to Avoid During Bedding-In
- Signs Your Brake Pads Have Been Successfully Bedded In
- Frequently Asked Questions
Last Updated: October 19, 2026
Why New Brake Pads Need a Break-In Period
Brake pad bedding-in is the process of transferring a thin layer of friction material from your new pads onto the rotor surface. This creates better contact and improves braking performance.
New pads arrive with a smooth, hard surface. That surface doesn't grip the rotor properly. When you bed in new brake pads, you're essentially preparing both the pads and rotors to work together.
Think of it like breaking in a new pair of shoes. They need time to mold to your foot. Brake pads need time to conform to your rotors.
Many vehicle owners skip this step or do it wrong. They drive normally, expecting the brakes to perform immediately. Then they notice longer stopping distances or a soft pedal feel.
Proper bedding-in takes about 200-300 miles of driving. During this time, you're building that critical transfer layer. Skip this, and you risk:
- Longer stopping distances
- Brake fade under heavy braking
- Glazing on the pad surface
- Inconsistent pedal feel
- Premature pad wear
The good news: bedding-in is simple and takes minimal effort. You just need to follow the right steps.
What You'll Need Before You Start
Before you begin the how to break in new brake pads properly process, gather these essentials:
- A safe, open location (empty parking lot or quiet road)
- Clear weather with good visibility
- At least 30-45 minutes of uninterrupted driving time
- Your vehicle's owner manual or pad manufacturer instructions
- A way to monitor your speed (speedometer)
- Cool-down time between stop cycles (patience)
You don't need special tools or equipment. This is a driving procedure, not a mechanical repair. Your regular vehicle is all you need.
Check your owner's manual first. Different manufacturers recommend slightly different speeds and stop counts. Some pad compounds require gentler initial braking. Others need more aggressive stops to transfer material properly.
If you're replacing both pads and rotors, the bedding process is the same. If you're installing new pads on old rotors, the procedure doesn't change, but monitor the rotor condition. Worn or damaged rotors may not accept the transfer layer properly.
Temperature matters too. Don't start bedding-in in extreme heat or cold. Room-temperature conditions work best. Avoid wet roads during the initial phase.
How to Bed In New Brake Pads and Rotors: The Step-by-Step Process
The bedding-in process follows a clear sequence. Each step builds on the previous one. Skipping steps or rushing through them reduces effectiveness.
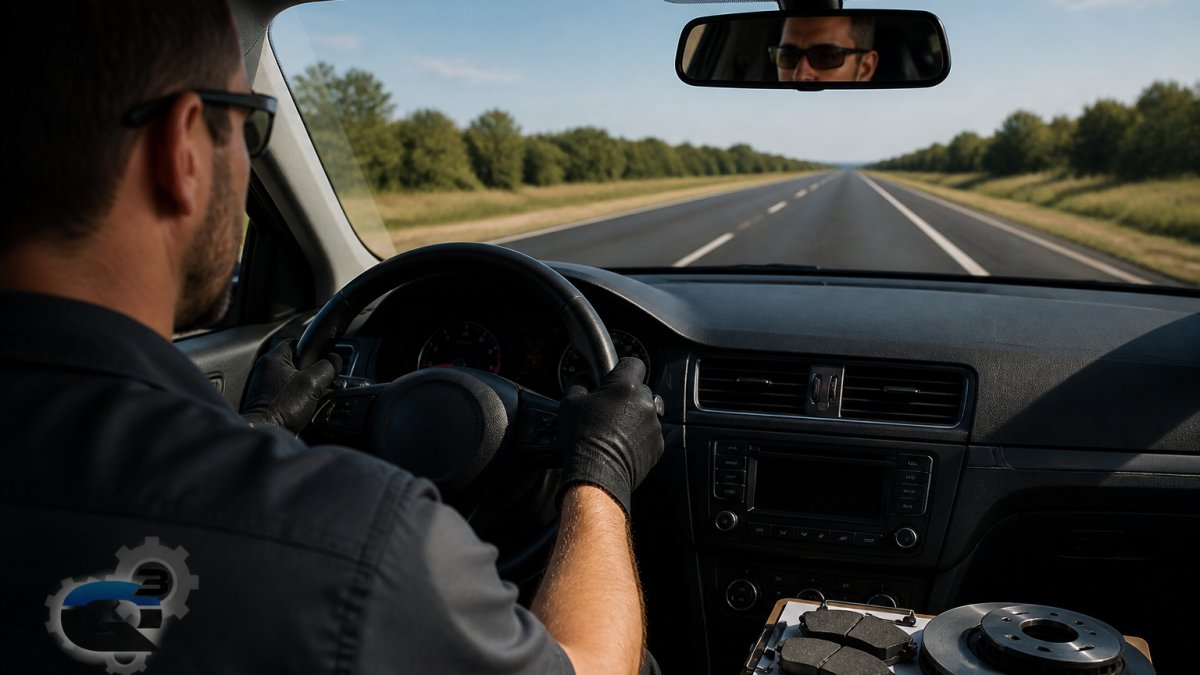
Step 1: Find a Safe, Open Location
Safety comes first. You need space where you can brake hard without endangering other drivers or pedestrians.
The ideal location is an empty parking lot or a quiet country road with minimal traffic. Avoid residential streets, highways, or areas where sudden braking might startle other drivers. You need clear sightlines in both directions and enough space to accelerate and decelerate safely.
A large, flat parking lot at a shopping center (during off-hours) works well. So does a quiet industrial road or a test track if you have access. The surface should be smooth and dry.
Avoid:
- Steep hills or mountain roads
- Heavy traffic areas
- Wet or slippery surfaces
- Roads with tight curves
- Parking areas with other vehicles
Step 2: Perform Initial Gentle Braking
Start at low speed. Accelerate to 15-20 mph, then apply moderate brake pressure. Don't slam the pedal. Aim for a gradual, controlled stop.
This first cycle is about introducing your new pads to the rotors. You're not building heat yet. You're just making initial contact and starting the transfer process.
Repeat this gentle braking 5-10 times. Each stop should feel smooth and progressive. You're teaching the pads how to grip.
After these initial cycles, let the brakes cool for a few minutes. Don't touch the pedal. Let air flow around the wheels. This cooling period is crucial.
Step 3: Execute Controlled Deceleration Cycles
Now increase your speed slightly. Accelerate to 30-35 mph, then apply firm (but not maximum) brake pressure. Aim for a moderate stop that takes 3-5 seconds.
Repeat this 5-10 times. The brakes will get warmer. You may hear some noise or feel slight vibration. This is normal. You're building the transfer layer now.
After these moderate stops, cool down again. Wait 5-10 minutes. Let the brakes return to a comfortable temperature.
Next, increase to 40-50 mph and repeat the process with slightly firmer braking. Again, 5-10 cycles. Then cool down.
Finally, accelerate to 55-60 mph and perform 5-10 firm stops. This is where significant heat builds. You'll feel the pedal work harder. The transfer layer thickens.
After this final set, cool down thoroughly. Drive slowly for several minutes without braking. Let the brakes return to normal temperature.
Step 4: Cool Down Between Stop Cycles
Cooling is not optional. It's part of the bedding process.
Between each set of stops, drive slowly without braking. Let air flow through the brake components. Avoid riding the brake pedal. Don't use engine braking on downhills. Just coast and let the brakes breathe.
Overheating during bedding-in can cause problems. If the brakes get too hot, the friction material can glaze. A glazed surface is slick and doesn't grip well. You'll have to start the bedding process over.
Watch your temperature. If the brakes feel extremely hot to the touch (too hot to hold your hand near the wheel), you've gone too far. Stop and let them cool completely before continuing.
How Long to Bed In Brake Pads
The total bedding-in process typically takes 200-300 miles of normal driving after you complete the controlled stop cycles.
During these miles, continue with gentle to moderate braking. Avoid hard stops unless necessary. Treat your brakes normally but with awareness that the bedding process is still ongoing.
The controlled cycles we described above take about 30-45 minutes to complete. After that, you need to log those 200-300 miles of regular driving to finish the transfer layer buildup.
Different pad compounds have different requirements. Organic pads may need less distance. Sintered or ceramic compounds often need the full 300 miles. Check your pad manufacturer's instructions for specifics.
Don't assume bedding is complete after the initial cycles. Those cycles are just the beginning. The real bedding happens during the miles that follow.
What Happens If You Don't Bed In New Brake Pads
Skipping the bedding-in process creates real problems. Your brakes won't perform as designed.
The most common issue is reduced braking power. Without a proper transfer layer, the pad surface can't grip the rotor effectively. You'll notice longer stopping distances.
Brake fade becomes more likely. When you need maximum stopping power, the brakes underperform. In an emergency stop, this is dangerous.
Glazing often develops on unbedded pads. The friction material hardens and becomes slick. This is especially common if you drive hard without bedding first.
Noise and vibration increase. Unbedded pads may squeak, squeal, or chatter. You might feel pulsing in the pedal.
Uneven wear accelerates. Without uniform pad-to-rotor contact, some areas of the pad wear faster than others. You'll need to replace the pads sooner.
The bottom line: proper bedding-in extends pad life, improves safety, and ensures your brakes work as the manufacturer intended.
Brake Pad Glazing Symptoms and How to Prevent Them
Brake pad glazing occurs when the friction material hardens and becomes slick. A glazed pad can't grip the rotor properly. Braking performance drops significantly.
Glazing happens most often when pads are driven hard without proper bedding-in. It can also occur if you overheat the brakes during the bedding process or if you use the brakes excessively on long downhill descents.
Common glazing symptoms include:
- Longer stopping distances
- A hard, unresponsive brake pedal
- Shiny or polished appearance on the pad surface
- Reduced braking power even after normal driving
- Squealing or squeaking noises
To prevent glazing:
- Complete the full bedding-in procedure before driving normally
- Avoid hard braking during the first 300 miles
- Don't ride the brakes on long downhill grades
- Allow adequate cooling time between heavy braking events
- Use gentle to moderate braking during normal city driving
If glazing occurs, the only real fix is to replace the pads and rotors and bed them in properly. You can't restore a glazed pad surface.
Common Mistakes to Avoid During Bedding-In
Many drivers make predictable mistakes during the bedding-in process. Knowing what to avoid saves time and prevents problems.
Mistake 1: Skipping the cooling periods. Drivers often complete all the stop cycles back-to-back without cooling.
Mistake 2: Using the wrong location. Bedding-in in heavy traffic or on a busy road is risky.
Mistake 3: Rushing the process. Some drivers try to complete bedding-in in one short drive. Then they drive normally.
Mistake 4: Ignoring the manufacturer's instructions. Different pad compounds have different requirements.
Mistake 5: Braking too hard too soon. The initial cycles should be gentle. Save the firm braking for later cycles.
Mistake 6: Driving down long hills immediately after bedding. Engine braking on downhill grades generates excessive heat.
Mistake 7: Not letting brakes cool after the procedure. After you finish the controlled cycles, drive slowly for 10-15 minutes.
Signs Your Brake Pads Have Been Successfully Bedded In
Once bedding-in is complete, your brakes should feel firm, responsive, and consistent.
A properly bedded pad gives you:
- A firm brake pedal that responds predictably
- Consistent stopping power from the first application
- Short, reliable stopping distances
- Smooth, quiet braking without noise or vibration
- Even wear across the entire pad surface
You'll notice the difference immediately. The pedal feels solid. Braking feels natural and controlled. There's no lag or soft response.
After the initial 300 miles of normal driving, you can resume your regular driving habits. Hard braking, mountain driving, and towing are safe again. The transfer layer is fully developed and stable.
A simple test: accelerate to 30 mph and make a moderate stop. The brakes should feel firm and responsive. The vehicle should stop smoothly without pulsing, noise, or hesitation.
If you still notice soft pedal feel, noise, or reduced stopping power after 300 miles, the bedding-in may not have been completed properly. Have your brakes inspected.
Proper brake pad bedding-in is straightforward when you follow the steps. It takes time and patience, but the payoff is better braking performance and longer pad life.
Frequently Asked Questions
What is the best way to break in new brake pads?
The best approach combines gentle initial braking with repeated controlled deceleration cycles on a safe, open road. Start at 35 mph and brake moderately to 5 mph, then accelerate back to 35 mph. Repeat this cycle 5-10 times, allowing the brakes to cool between stops. This process builds a uniform transfer layer on the rotor surface, which is essential for optimal braking performance and friction coefficient development.
How long does it take to bed in new brake pads?
The complete bedding-in process typically takes 200-300 miles of normal driving after the controlled deceleration cycles. Initial controlled stops may take 15-20 minutes. However, full friction material transfer and optimal contact surface development continue during regular driving over the first few hundred miles. Manufacturer instructions vary, so always follow the specific guidance that came with your brake pads.
What happens if you don't bed in new brake pads?
Skipping the bedding-in process can result in reduced braking performance, longer stopping distances, brake fade during heavy braking, and premature pad wear. Without proper transfer layer development, the friction coefficient remains inconsistent, and the pad-to-rotor contact is uneven. You may also experience noise, vibration, or a soft brake pedal feel until the pads naturally bed in through regular driving.
Do new brake pads need to be bedded in if the rotors were not replaced?
Yes. Even if only pads are replaced, bedding-in is still necessary because new friction material must create a proper transfer layer on the existing rotor surface. The process may be slightly shorter than when both pads and rotors are new, but the controlled deceleration cycles are still important for establishing uniform contact and consistent braking performance.